Temperature, humidity and barometer
Climate. Controlled.
And it even predicts the weather
Local weather forecast
A barometer allows you to predict the weather locally - without needing a cloud service.
Thermostat monitoring
Logging data can offer insights into temperature use and humidity fluctuations (which your skin dislikes)
Disable data transmission
Don't want to feel recorded? Just stop the sensor from transmitting data for a while.
Toggle the touch screen
Is the screen too bright at night? Touch it to turn it off, or say "Turn off the screen of the climate sensor".
Your data is sensitive
Patterns in your temperature and humidity data could reveal more about you than you might realise. Specialised algorithms compare your patterns with those of other people that have shared much more about their lives. Perhaps your pattern matches energy wasters, or indicates health issues. These algorithms are often wrong, but their conclusions are taken seriously nonetheless.
The best way to protect you and your family is to make sure the data never gets sent to a cloud service in the first place.
Creating the sensor
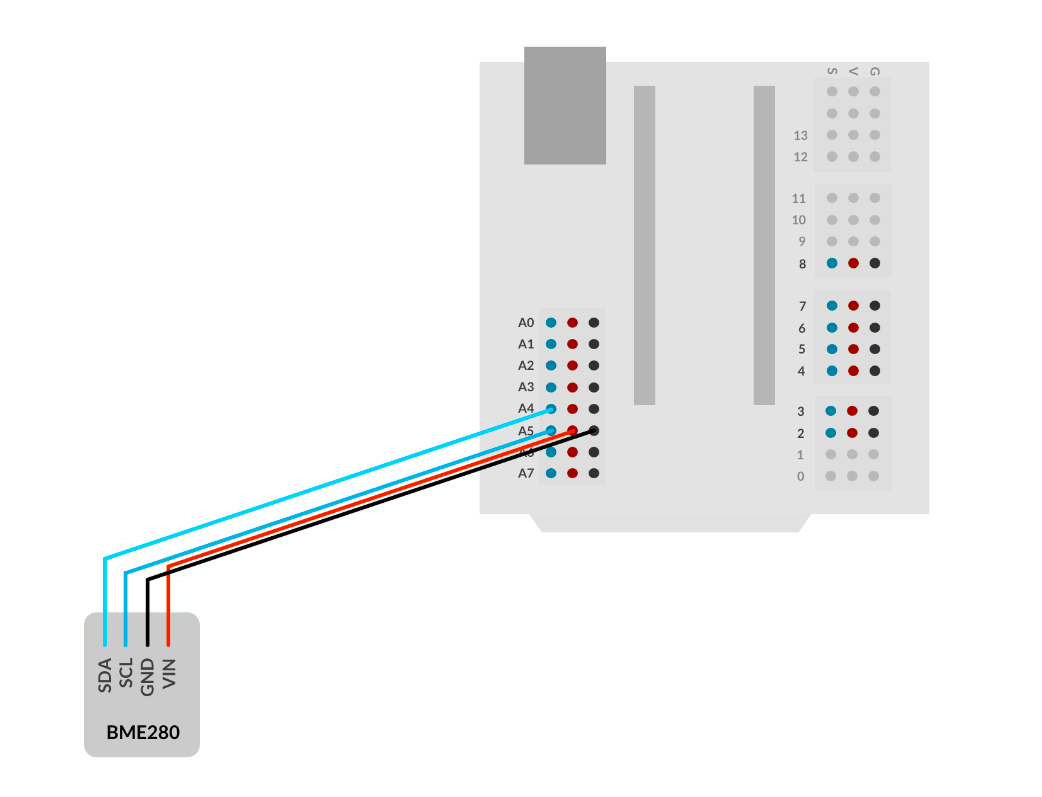
Connect the BME280 sensor
Connect its SDA (data) pin to signal pin A4 on the expansion board, and connect its SCL (clock) pin to signal pin A5 on the expansion board.
Connect its VCC (positive) pin to any VCC pin on the expansion board, and connect its GND (negative/ground) pin to any GND pin on the expansion board.
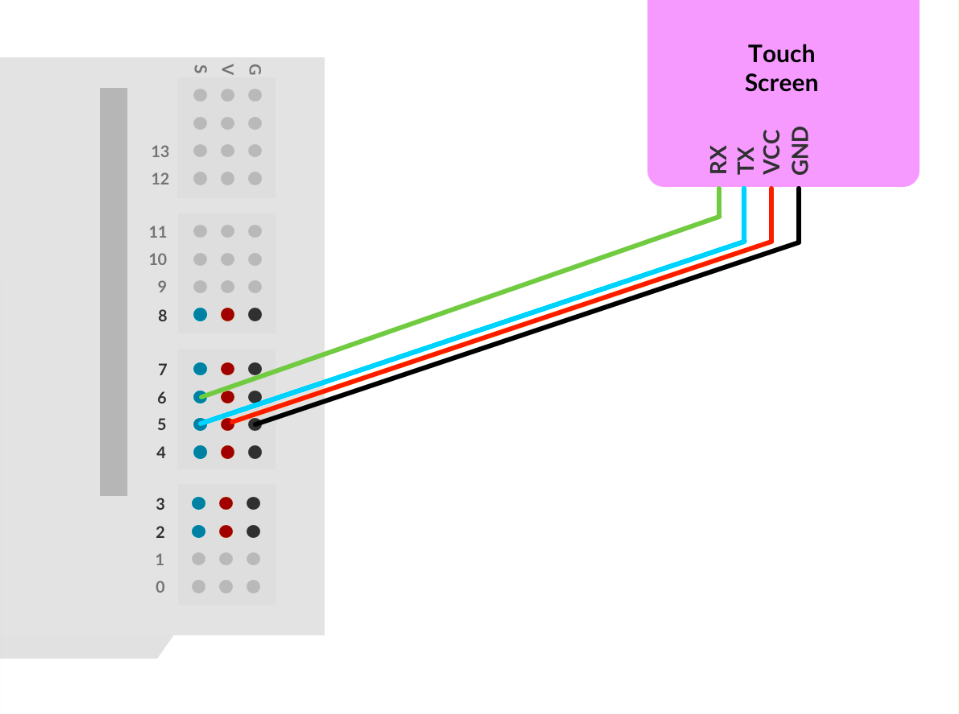
Connect the touch screen
The touch screen is an optional part, but it's nice to have. It shows the live temperature, humidity and barometer values, as well as an icon that indicates the current weather prediction. Touching the screen will turn it on or off.
Connect its TX (Transmit) pin to signal pin 5 on the expansion board, and connect its RX pin (Receive) to signal pin 6 on the expansion board.
Connect its VCC (positive) pin to any VCC pin on the expansion board, and connect its GND (negative/ground) pin to any GND pin on the expansion board.
Plug in the RF-Nano Arduino
Plug the RF-Nano into its socket. The USB connector should be on the outside of the main board.
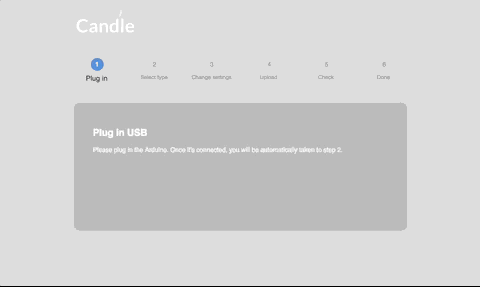
Open the Candle Manager
Select the Candle Manager from the menu, and follow the steps. It will help you upload the code to your new creation.
Add your new device
Visit the Candle controller and on the things page press the (+) icon. Your new creation should be available. Optionally, select which of its properties you'd like to have in the spotlight. Click on "save" to complete the proces.